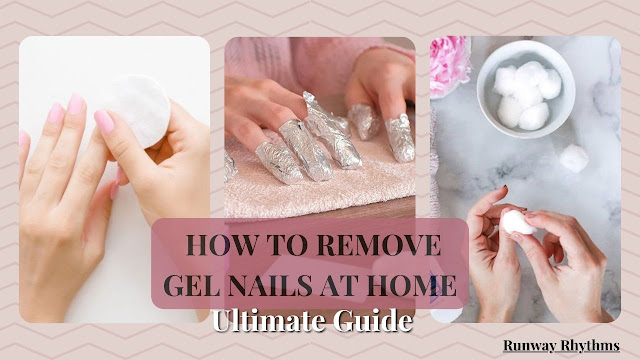
Welcome to our comprehensive guide on removing gel nails at home! Gel nails have become increasingly popular due to their long-lasting shine and durability. However, when it comes time to remove them, many people find themselves unsure of the proper process. Fear not, as we're here to provide you with step-by-step instructions on how to safely and effectively remove gel nails in the comfort of your own home.
Gathering Your Supplies
Before we dive into the removal process, let's ensure you have all the necessary supplies on hand:
- Acetone: This is the key ingredient for removing gel nails.
- Cotton balls or pads: You'll need these to soak in acetone.
- Aluminum foil: Used to wrap your nails during the soaking process.
- Nail file or buffer: To gently roughen the surface of the gel nails.
- Cuticle oil: For moisturizing and nourishing your nails post-removal.
Step-by-Step Guide
Step 1: Prepare Your Workspace
Start by creating a comfortable and well-lit workspace. Lay down some paper towels or a towel to protect your surfaces from any spills or acetone drips.
Step 2: File the Top Coat
Using a nail file or buffer, gently file the shiny top coat of your gel nails. This helps break the seal and allows the acetone to penetrate the layers more effectively.
Step 3: Soak Cotton Balls in Acetone
Take your cotton balls or pads and saturate them with acetone. You want them to be damp but not dripping wet.
Step 4: Wrap Nails with Aluminum Foil
Place each acetone-soaked cotton ball on top of your nails, then tightly wrap them with aluminum foil. This creates a barrier to lock in the acetone and prevent evaporation.
Step 5: Wait Patiently
Now, it's time to wait. Allow the acetone to work its magic for about 15-20 minutes. You may feel a slight warming sensation, which is normal.
Step 6: Remove Foil and Cotton Balls
After the waiting period, carefully remove the foil wraps from each nail. Use gentle pressure to wipe away the softened gel with the cotton balls or pads. If there are any stubborn areas, you can use a wooden cuticle stick to gently push off the gel.
Step 7: Hydrate Your Nails
Once all the gel has been removed, it's essential to hydrate your nails. Apply cuticle oil generously to each nail and massage it in to replenish moisture and nourish your nail beds.
Tips for Success
- Be Patient: Rushing the removal process can damage your nails. Take your time and let the acetone do its job.
- Don't Force It: If the gel isn't coming off easily, resist the urge to pick or peel it off. This can cause significant damage to your nails.
- Moisturize: Keep your nails hydrated after removal to prevent them from becoming dry and brittle.
Additional Tips and Alternatives
Gel Nail Removal Kits
If you prefer a more convenient option, consider investing in a gel nail removal kit. These kits typically include everything you need for the removal process, including pre-soaked pads or wraps infused with acetone. They can be a time-saving and mess-free alternative to gathering individual supplies.
DIY Acetone Soak
If you're unable to access acetone or prefer a more natural approach, you can create your own acetone soak using household ingredients. Simply mix equal parts acetone and warm water in a bowl and soak your nails for the same duration as outlined in our step-by-step guide.
Professional Removal
While removing gel nails at home is entirely feasible, some individuals may feel more comfortable leaving it to the professionals. If you're hesitant or unsure about DIY removal, schedule an appointment with a nail technician who can safely remove your gel nails using professional-grade products and techniques.
Common Mistakes to Avoid
Skipping the Top Coat Removal
Failing to file the top coat of your gel nails adequately can impede the acetone's effectiveness. Ensure you take the time to gently roughen the surface before proceeding with the removal process.
Using Pure Acetone
While acetone is necessary for removing gel nails, using pure acetone can be harsh and drying on your nails and surrounding skin. Opt for an acetone formula specifically designed for nail polish removal, which often includes added moisturizing ingredients.
Over-soaking
Leaving your nails submerged in acetone for an extended period can strip them of essential oils and moisture, leading to dryness and brittleness. Stick to the recommended soaking time to avoid damaging your nails.
Final Thoughts
Removing gel nails at home doesn't have to be intimidating or complicated. Armed with the right knowledge and supplies, you can achieve salon-quality results in the comfort of your own home. Remember to be patient, gentle, and mindful of your nail health throughout the process.
.png)
